


Welcome to Groups in Annotator
The Annotator tool lets you have conversations right on top of websites, documents, and articles. When you use Groups, you organize those conversations into separate, dedicated spaces.
Groups are an essential feature for collaboration and focus. They allow you to:
-
Keep Discussions Private: Ensure your notes and conversations are only visible to specific people, such as your classmates, study partners, or work colleagues.
-
Filter the Conversation: When you are viewing a page within a Group, you will only see the annotations made by members of that Group. This filters out the general public discussion, letting you focus on what your team is saying.
-
Separate Projects: Use different Groups to keep the discussions for your English class separate from your History class, or your work project separate from a personal reading club.
Understanding the Different Types of Groups
The Annotator tool offers three main ways to manage who joins your group and who can see your comments. Think of them as different levels of privacy and access:
| Group Type | Private Group | Restricted Group | Open Group |
| What is it for? | Completely private, secret discussions for friends, teams, or classes. | Focused discussions managed by an organization (like a school) on specific documents. | Broad discussions on specific documents that anyone logged in can contribute to. |
| Who can Read Annotations (View the comments)? | Only members who are logged in. | Anyone visiting the specific webpage can read them. | Anyone visiting the specific webpage can read them. |
| Who can Post Annotations (Add a comment)? | Only members who are logged in. | Only members who are logged in. | Any logged-in Annotator user (membership is not required). |
| How to Join? | Invite Only. The creator shares a special link, and you must use it to join. | Invite Only. Membership is managed by the organization or partner (e.g., your school). | No Joining needed. Anyone logged into Annotator can comment on the designated documents. |
| Who can Create? | Anyone. You can create one right now! | Created by Annotator on behalf of partners. | Created by Annotator on behalf of partners. |
In simple terms:
-
Private Groups are the most common. They are designed for collaboration that must be kept secret. You create it, you invite people, and only those people see your comments.
-
Restricted and Open Groups are typically set up by schools, publishers, or large organizations. They are usually designed for public viewing on specific documents, though the ability to comment might be restricted.
How to Start Annotating in a Group
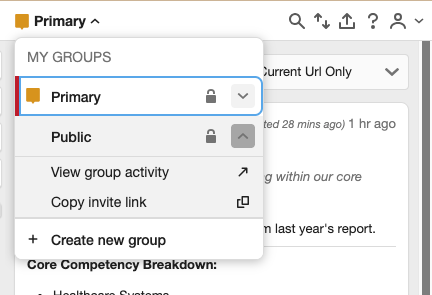
Annotator Group Selection
To ensure your comments go to the correct group discussion, follow these simple steps:
-
Open the Document and the Annotator Sidebar: Go to the web page or document you want to discuss. Open the Annotator tool’s sidebar (usually by clicking the small Annotator icon in your browser).
-
Select Your Group: Look in the upper left corner of the Annotator sidebar. You will see a small box that shows the current viewing layer (it might say “Public” or the name of a group you were last using). Click on this box to see a list of all your groups. Click on the name of the group you wish to switch to.
-
Post Your Comment: The box in the corner should now clearly show your group’s name. When you highlight text and write a comment, the post button will say “Post to [Group Name]”. Click this button. Your comment is now successfully posted and visible only to the people allowed in that group!
Quick Tip on Personal Privacy: Even when you are in a Group, you can still choose to make an annotation fully private, meaning only you can see it. Before you click the post button, look for the option to switch the post setting from “Post to [Group Name]” to “Post to Only Me”.
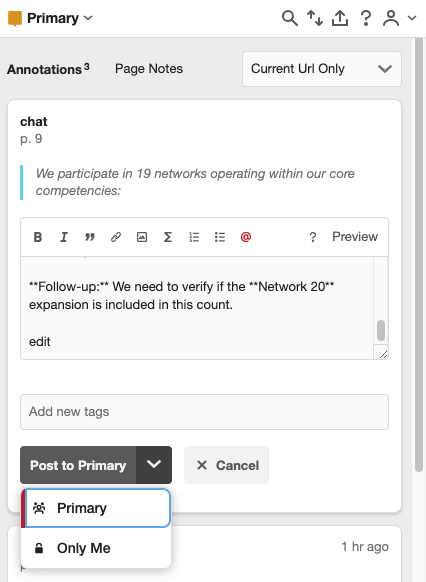
Annotator Posting Access Options
Accessing and Viewing this Help
This document is part of a larger help system designed to make using the Annotator tool easy.
-
Finding Other Help Articles: If you are looking for help on a different topic (like creating a new account, using the search feature, or image annotation), look for the “Knowledge Base” or “Help Center” link on the main Annotator website. You can typically find a search bar there to type in your specific question.
-
Technical Support: If you have tried the steps above and are still having technical trouble, the best way to get personalized help is to use the “Create a Ticket” or “Contact Us” link. This allows you to send a private message to the support team, who can walk you through the solution.
-
Check the Status: If you suspect the Annotator tool or the website is experiencing a widespread issue, you can check the “Status” page (often linked at the bottom of the main website) to see if there are any known service outages.